


Wow, wow, wow it's been like 3 days since my last post!!
Told ya this working & trying to keep up with my household was going to be a challenge!
O heck, 3 days is not bad!
***************************************
Bizzy Becs has a new Blue Butterfly Stamp Line available for purchase at the store. This line is called:

Bec is dedicating this line to her DT cuz we bugged her for some boy images and BOY oh BOY are these some cuties! This image is called Cody on a Scooter. What a superstar hey? I layered him up with some papers I bought at Hobby Lobby last November. I used my slit punch to make a place for my ribbon to run thru the nestie shape. The word PLAY is made of stickers.

I have had a couple questions about my coloring with water color pencil crayons, blending stumps & baby oil. Now I am NO expert in this area, in fact I learned what I know from The Prairie Fairy (she has an even better tutorial HERE on Paper Craft Planet). Here's a quicky MY version.
On the left here you see my blending stumps in one container & in the other container is a sponge with some baby oil soaked into it. Some people use gamasol instead of baby oil, but the good thing about baby oil is that is doesn't smell (unless you use the baby powder scent- then your pic will be like a scratch & sniff-lol). Anywho, the pic on the right is a pkg of blending stumps unopened. I am showing you these two pics, cuz I had NO IDEA what a blending stump was!! So there you go.


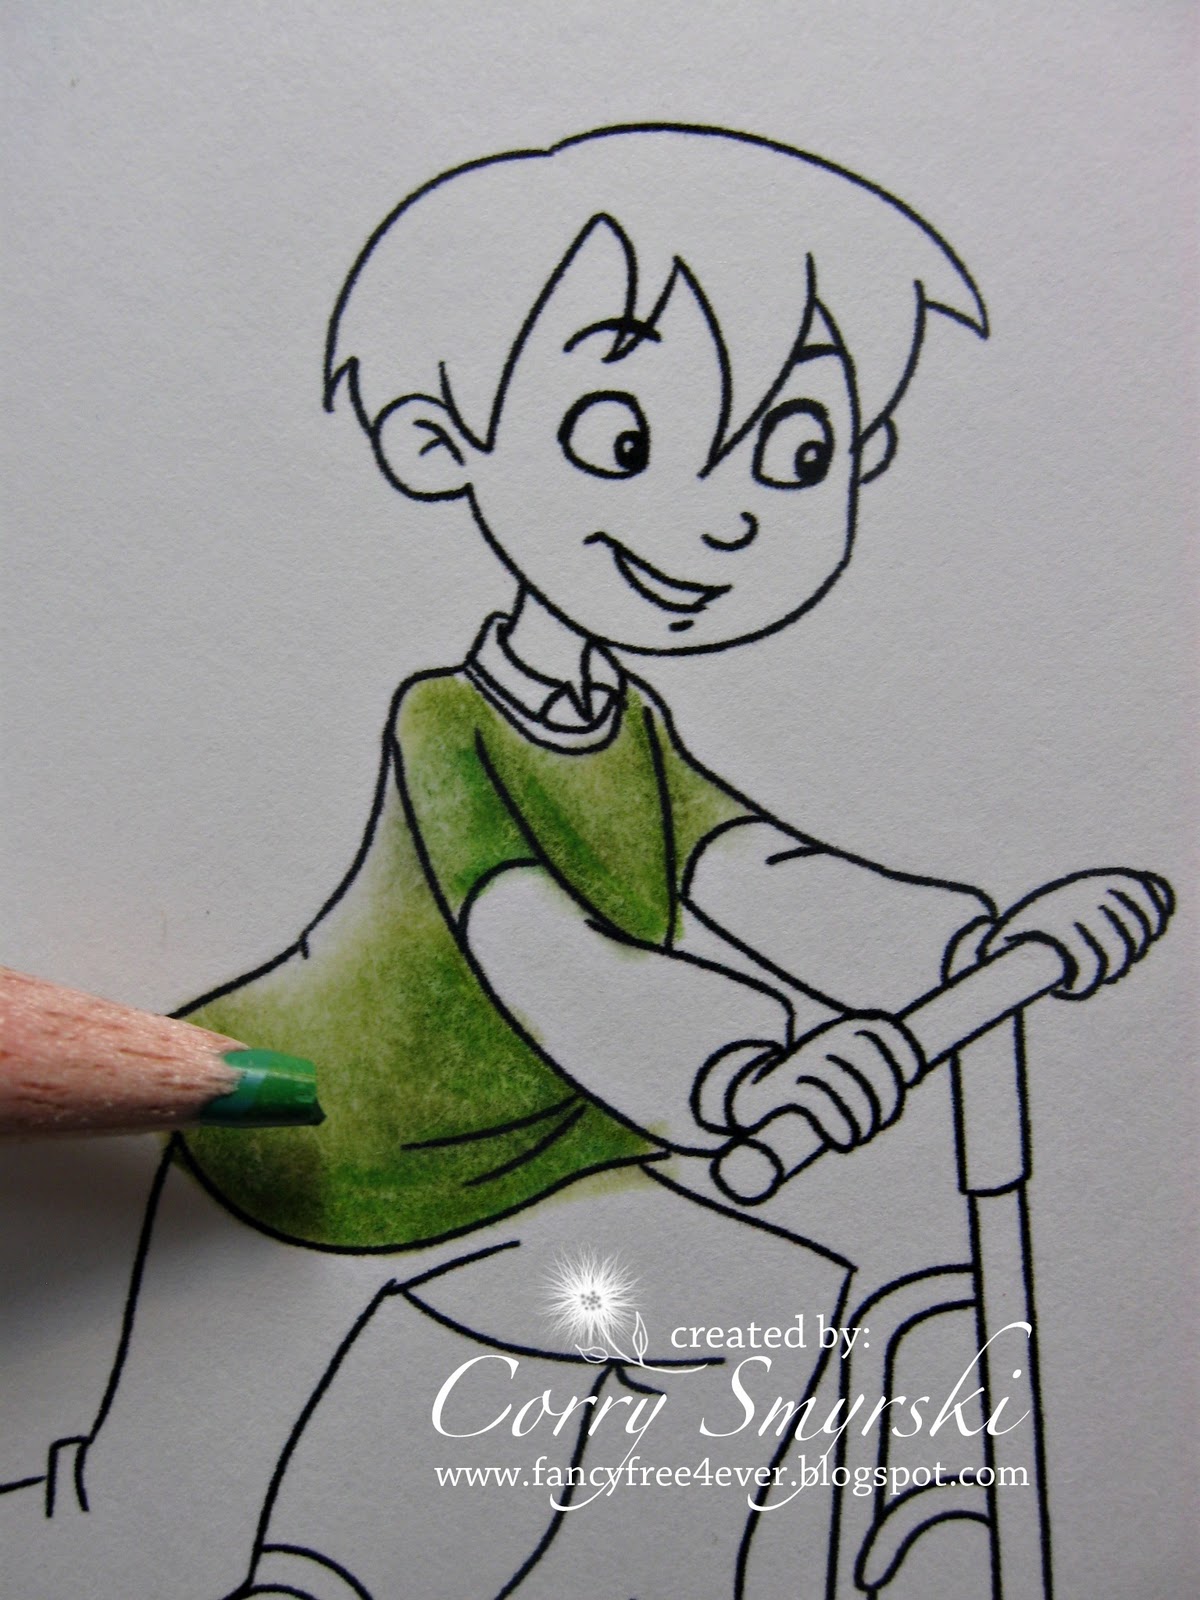
#1. So I take my light green first and I start to color around the edges. Keep in mind that the blending stump will allow you to carry the color, so don't color the whole section if you want lighter parts.
#2. Then I take my blending stump & start blending the color in a small circular motion
#1 #2
#2
 #2
#2
#3. Then I take a darker/different shade of green & add it to areas I want to be a bit darker on his shirt
#4. Shows where I have added more color.
#3 #4
#4
 #4
#4
#5. woops sorry, told you I am not very good at this but this pic shows that I have blended the second color green in already and am now adding a third shade for more effect.
#6. I've started on the pants. A light shade of brown first.
#5  #6
#6
 #6
#6
#7. Brown blending stump, shown before blending began
#8. Shows part of the colored pants blended in already
#7 #8
#8
 #8
#8
#9. Shows the first shade of brown completely blended then I am adding another shade of brown overtop with the same rule as the shirt. Where I want it darkest, I'll keep adding color and blending it out.
#9

You see the finished picture at the top on my card.
Hope this helps & inspires you to try a new technique yourself!
Take Care
Challenges for my card:
Incy Wincy- for the boys
Charisma Cardz- use a die cut
Tellen's Place- Sports theme
Paper Pretties- masculine card


21 comments:
You know Cori, a few days ago, I didn't even know there is anything called watercolor pencils! I still struggle with my promarkers. Great tutorial.
he's gorgeous! love your colouring tutorial. if I ever graduate from chalks and hairspray I'll be sure to look it up :P
♥
Hi Corry, I really don't know how you do it hun. You must be great at juggling. I just have work and house to sort out, no little ones and I always seem to chasing my tail. So glad you do manage it thogh as I love visiting your fab blog. Love your card. Great idea with the slit punch and fantastic colouring. Love the tut too, very clear and easy to follow. Hope you really enjoy the weekend hun.
Donna x
Wow Corry this is awesome, love that paper and thank you for your great tutorial.. you make it look so easy, your colouring is fantastic.. I had seen these blending stumps but even I had no idea what they were, they look fantastic to use. Yes, it would be really hard to keep up with the blog, housework, a job and kids ... aaaahhh I know about that too much!!!
love to see thesteps of the picture, thanks for showing us!
Hello Corry. This is fabulous, and I just love your image and fab colouring. Great background paper and I just love all the bright colours. Thank you for joining us at Tellens Place and good luck.
Love Sandra xxx
Very very cute image. Your coloring is fabulous and Thanks for joining us a Tellen's Place.
A lovely card and a great tutorial. I love this watercolour technique for the softer look. Thankyou for sharing this with us at Tellen's Place this week and hope to see you back again next time
Sensational piece of work, Corry! I really love it - everything about it is perfect - colors, embellishments and that gorgeous coloring. Thanks for the mini tut - I haven't had my colored pencils out in quite some time. Maybe one of these days I'll find time to play around thanks to your inspiration.
Have a great weekend.
Hugs,
Linda
Hi Corry, maybe you don't feel like an expert but your coloring is wonderful. You did a great job with the tutorial. Your card is just adorable! Thanks for joining us over at the Tellen's Place sports challenge. Good luck and I really hope you will play with us again!
Hugs, Sarah
This is fantastic Corry!! I love your use of stickers! Thanks for the little tutorial, may have to have a got at that some time!
xxAutumn
I love this card, especially the star and the ribbons. they look fabulous and your coloring is great, I can't believe you're just learning this. and thanks for the tutorial cause I've never blended pencils, maybe I'll give it a try.
thanks for playing with us at Paper Pretties.
Your post has given me a new respect for my water colour pencils. I'd never thought of baby oil to blend them (when I read it I thought it would give the paper a greasy stain, so I'm going to have to give it a try). Thanks so much for the tutorial, and a fab card. Annette xx (Incy Wincy DT)
Great card and tutorial!!
love it, Cor! i'm totally digging the little dude in the corner (Me & My Big Ideas?) - he goes great with your image! gorgeous colouring and great little tute! thanks for playing with us Charisma Gals! i always love dropping by your blog! xo
Great tut! Super helpful....and your card is perfect! Soooo cute!
A fantastic card love your colouring thanks for playing at Tellens Place this week
Luv Jane xxx
What a great boy digi....and my oh my what great coloring...love the tutorial. I need to try my water color pencils again.
smiles...Tammy
This is amazing - love the 3D feel of this beautiful card - the image is colored so perfectly - love your instructions! All of the extras in the card really stand out! Thanks for joining us this week for our "Sports" challenge at Tellen's Place! :~)
Great card and wonderful colouring! Thanks very much for playing along with our Sports challenge at Tellen's Place this week :D
Thanks Cor for the tutorial and I am now the proud owner of blending stumps!Trish xx
Post a Comment